It's a long story, so here's the Reader's Digest version - I sent my client e-mail out yesterday with the promise of a class schedule for July on my blog and website. Well, I went to eat lunch and came back to find my internet service down. So, no schedule posting for me yesterday.
My sweet friend Andrea, who reads my blog diligently (!), e-mailed me to shake my tree and pry those class dates out of me! heehee
So here you go:
Just Cards- More Going, Going, Gone Retiring Stamp Sets Cards!
$15 includes all supplies
Tuesday, July 22nd 10 am
Tuesday, July 22nd 7 pm
Saturday, July 26th 10 am
Class size limited to 12 attendees each
RSVP via e-mail to stampwithrobin@yahoo.com
Scrappin' Simplified- Scrapbooking the Stampin' Up! Way
Class #3
$20 includes all supplies
Thursday, July 10th 10 am
Saturday, July 10th 10 am
Class size limited to 8 attendees each (priority seating to series Subscribers)
RSVP via e-mail to stampwithrobin@yahoo.com
I'd love to stamp and scrap with you in July - reserve your seat early with a $5 deposit per class.
Happy Saturday!
Robin

Saturday, June 28, 2008
Friday, June 27, 2008
Blogger's Challenge - Week #53 Resist Technique

Well, here we are at Friday again and it's time for the next Blogger's Challenge post. In all honesty, I almost "resisted" creating a card for this week, I've had so much on my plate. But, I needed to finish designing for my "Going, Going, Gone" Stamp Camp this Saturday morning, so I figured this card could do double duty.
Bud Basics is the name of this stamp set and yes, it's retiring on this current list. I am sad about this one - it was released around the time I first became a demonstrator, so it's been in my cabinet for a while now.
But, enough melancholy - on with the CARD!
My card base is Tempting Turquoise layered with a piece of Pumpkin Pie Designer Series paper and embellished with some White Taffeta Ribbon (so easy to work with!).
The Green Galore layer is paper pierced all around the edge with the Piercer and Mat Pack from the Crafter's Tool Kit. It's layered with Pumpkin Pie cardstock and again with Whisper White cardstock. NOW, for the RESIST!
The top layer utilizes a piece of Glossy White Cardstock. I stamped the outline images from Bud Basics with Basic Black ink. Then I used a clear wax crayon from my Easter Egg dyeing kit and colored in the areas that I wanted to stay white. (You can also use a white crayon for the same effect)
Next, I used stamping sponges and layered on the colors - Tempting Turquoise, Green Galore and Pumpkin Pie.
Once I was sure it was dry, I wiped the crayon residue off with a napkin and VOILA! - Bright, fun, Crayon Resist! :)
To finish off the card, I used some of my FAVORITE Rhinestone Brads and stamped the sentiment from All Holidays onto Whisper White cardstock. I punched it out with the Word Window punch and wrapped it around the top two layers. Popped up on dimensionals, this card is done!
I hope you like these fun colors - I needed something cheerful today and though I don't often work with Bold Brights, these just seemed to lift my mood today!
Happy Weekend everyone!
Robin
Thursday, June 26, 2008
Oh, My, Goodness!

I am beyond words right now.........one of my stampin' idols, Patty Bennett, has just nominated my blog for the Kreativ Blogger award! She is amazing and I'm sure if you read my blog often, you've had a chance to check out all her great work from the link on my sidebar - Patty's Stamping Spot. I'm definately feeling the "I'm not worthy" WOW right now. Thank you so much Patty!
To be honest, I was having a not so great day today and I found a message from Patty when I came back to the studio from lunch. This has definately made my week!
I want to pass on the award to a couple of other stampin' stars who inspire me all the time:
Patti Chesky at http://atouchfromtheheart.blogspot.com/ and
Amy Caraluzzi at http://amycara.blogspot.com/
Be sure to check out their blogs and be inspired!
Happy Thursday everyone!
Robin
Tuesday, June 24, 2008
Make a Wish.......
 and it may come true! Mine did when I found out that this stamp set, Stitched Exotics, did NOT make the retirement list! Whew! I so love this stamp set and was very glad to see that it's sticking around a while.
This card is another of the projects I created for my upline's website.
I used Real Red cardstock for the base, folded in half at the top. The layers are Wild Wasabi (retiring soon!), Whisper White and Bashful Blue under the stamped flower to match the Striped Grosgrain Ribbon.
I stamped the swirl in Wild Wasabi and the flower in Real Red. The 2nd flower image in the set is stamped in Real Red on the card front for a background.
The flower center is created with the Build - a- Brad and one of the sticky die-cuts from Build - a - Flower. The whole flower image is popped up on Dimensionals. I used the ticket corner punch for the layered corners and adhered a Rub-On from the Eastern Elegance pack that says Make a Wish.
It was really a very simple and quick card to make, but bright and cheerful - perfect for a birthday card!
Happy Tuesday everyone!
I do still have space in Saturday's 10 am Stamp Camp if you'd like to come! Just give me a call!
Friday, June 20, 2008
Blogger's Challenge Week 52 - "Manly" Cards

I'm not sure how "Manly" this card is, however, I made if for my Dad for Father's Day so that has to count for something, doesn't it?
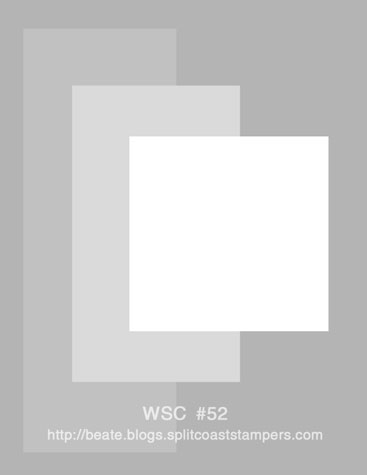
For my die hard Stampin' Up! fans (like me!) I delved deep into my retired stash of stamps and pulled out one of my all time favorites - Architectural Elements. This set, to the best of my recollection, did not have a very long life in the catalog, it may have only been in a mini, I'm not sure. But, I absolutely LOVE these images and will probably never part with it.
I used the sketch from Beate's weekend sketch challenge last week found at this link: http://beate.blogs.splitcoaststampers.com/files/2008/05/wsc52.jpg
It is a great sketch and probably one I will go back to again and again.
For the stamping, I used two images for my background and stamped them with Black Staz-On ink on Whisper White cardstock. My focal point image was stamped the same way.
The layering was pretty simple once I chose my accent color of Ballet Blue. I placed the Silver Brads across the bottom two layers using my Crafter's Tool Kit Paper Piercer, Positioning Mat and Foam Mat. I started in the middle and worked my way out to each side to get them all even. That Mat Pack is the BEST! Yes, count 'em, there are 13 brads across the bottom!
Anyway, all the layers are adhered together and mounted on dimensionals to add some height. And that's about it. Very simple and clean. My Dad loved it, btw. He used to be a builder and I knew he'd love these images.
Happy Friday everyone! Be sure to check out all the other great projects by clicking on the Blogger's Challenge button in my sidebar. There are some very talented ladies who participate each week!
Thursday, June 19, 2008
I'm Going to the Beach......

But not until August! Bummer! However, the project I have to show you today gets me in the mood for our upcoming vacation.
This is another project that I created for my upline's website as one of her Featured Artists for this Catalog. She has given me permission to post the pictures here as well.
I think the technique of stamping on candles is so cool and when I was working with this stamp set called 'Seaside' (which is going dormant with this catalog, btw) I thought how fun it would be to mimic the candles I often see in high end gift shops (read - expensive!) and place the shell images around the base and cover them with sand.
So, I stamped my images with Blue Bayou, Creamy Caramel and Close to Cocoa onto tissue paper, cut them out and wrapped them around the candle with wax paper. Holding them in place, I used my Heat Tool to melt the stamped tissue into the surface of the candle. Once all the images were in place, I painted the base of the candle with Crystal Effects and rolled it in craft sand. The picture is a little dark to see it well, but in real life it is very cool.
The wrap at the top is layered cardstock in Blue Bayou (retiring soon!) and Naturals Ivory. I crimped the Blue Bayou and stamped shells onto the Naturals Ivory along with the speckled background from Itty Bitty Backgrounds. I then slightly wet the Ivory cardstock and crumpled it multiple times, spreading it out to dry. Once it was dry, I sponged it lightly with Creamy Caramel ink.
The wrap was finished off with a stamped starfish image, Creamy Caramel on Naturals Ivory, which was cut out and tied around the other layers with Blue Bayou stitched ribbon (also retiring!) I used a Pewter Jumbo Eyelet and my Crop-a-Dile to create the resting place for the ribbon knot. The ribbon ends are distressed to match the overall look of the candle.
If you want to learn how to stamp on candles, leave me a comment in this post. If there is enough response, I can work it into Stamp Camp in July before all the In Colors are gone!
See you tomorrow with my weekly Blogger's Challenge post! Don't forget to enter the card giveaway contest in one of my earlier posts this week - it ends tomorrow!
Wednesday, June 18, 2008
BIG Announcement from Stampin' Up!
WOW! Have I got news for you!
Yesterday, Stampin' Up! CEO and Founder, Shelli Gardner announced the start of a BRAND NEW Product Line called:
Decor Elements (Click to view the preview brochure!)
What is this new product? Décor Elements is a line of wall art made from vinyl used to decorate your home. This new line coordinates with our existing products, so it's a perfect complement to your stamping and crafting! You'll soon see that our offering of images, phrases, and letters for home decorating is an easy, cost-effective way to add our gorgeous Stampin' Up! artwork to all areas of your home.
And the best part is that it's easily removable! No muss, no fuss - perfect for when you are in temporary housing, a rental unit, college dorm or just want to make a decorating change!
These beautiful art pieces and phrases will be available for purchase on JULY 1st! I hve ordered my sample pieces today, so you should be able to preview them in person at Stamp Camp on Saturday, June 28th!
Be sure to take a look and tell me what you think!
Tuesday, June 17, 2008
Saying Goodbye is Going to be Hard!

Be sure to read all the way to the bottom - there might be a prize waiting!..........
One of the things I hate and love about being a Stampin' Up! demonstrator is that I fall in love with the stamps and accessories I use a lot. The hate part is that sometimes they go away! Sniff! At least I can still hoard them in my personal collection! :)
This card uses two stamp sets that are saying bye-bye soon, and two accessories that are leaving us as well.
The cute park bench comes from the Time for You set that is in the Occasions Mini which expires on JUNE 30th. I've stamped it in Basic Brown ink and colored in the birdy with Brocade Blue marker, keeping it simple. It's sponged with Rose Red ink and layered on Chocolate Chip and Pretty in Pink cardstock.
The medallion is the Thinking of You stamp from Circle of Friendship which is on the retiring stamp set list AND is part of the eScape Bundle Sale this month. (See my website here for details: http://www.stampinup.net/esuite/home/robinstamps4u/promotions )
I've stamped it twice with Basic Brown on Very Vanilla and Pretty in Pink and punched the pieces out with the 1" Circle punch and the 1/2" Circle punch. They are layered on to Rose Red Designer Prints Paper and Chocolate Chip cardstock which are punched with the 1 1/4" Circle punch and 1 3/8" Circle punch. The stamped circles are popped up on dimensionals, then all 4 layers are popped up above the bench layers.
The ribbon is the beautiful Chocolate Chip Twill from the Occasions Mini and the Silver Ribbon Slide is from the Silver Hodgepodge Hardware in that same catalog. Both of these are saying bye-bye at the end of JUNE! Waaah!
The base layers are Rose Red Designer Prints Paper, Pretty in Pink cardstock and Chocolate Chip cardstock. If you are attending stamp camp on 6/21 or 6/24, this is one of the cards you will be creating!
Leave me a comment if you like this one! Tell me who your best friend is and why - I'll choose a random post number on Friday morning and GIVE you this card!
Remember, ya gotta play to win!
And the Winner is..........
Stacy Stec!
Yes, she guessed the most retiring sets for the Pick and Win contest. Stacy had 46 of the 96 sets that are retiring. Way to Go Stacy! Congratulations! You must have had someone whispering in your ear from corporate - I only guessed 31 correctly.
This must be Stacy's lucky month because she not only wins the $20 SU! Gift Certificate, but she won my card give away earlier this month.
Remember, when I run a contest - ya gotta play to win!
Thanks to all of you who participated this time. You made some really great guesses and it was fun for me to see how much we all thought alike on many of the retirees. In case you haven't seen the list yet, here is the link for the "by page number" list.
http://www.stampinup.net/uploads/fckeditor/stampinup/File/June%202008/Retired_Lists_0608_US_N.pdf
Just click on it and you can print a copy from your computer.
I'll be back later with a creative post!
Sunday, June 15, 2008
Where Do Stamps Go When They Retire?
 Apparently they go to Florida or some tropical locale!
Well, while they may be lucky for the R and R, we are sad to see them go - I have several favorites on this list, sniff, sniff! I'll share them with you later when I have more time.
Here is the link to the Alphabetical List: http://www.stampinup.net/uploads/fckeditor/stampinup/File/June%202008/Retired_Lists_0608_US_A.pdf
Here is the link to the By Page Number List: http://www.stampinup.net/uploads/fckeditor/stampinup/File/June%202008/Retired_Lists_0608_US_N.pdf
If you played in my Pick and Win contest, the winner will be announced on Tuesday! Stay tuned!
Have a great Father's Day!
Friday, June 13, 2008
Blogger's Challenge - Week 51 - Color Challenge!

Hello out there in Blogger Land! It's with great misgivings that I am posting my "creation" for this week's Blogger's Challenge. You see, Bold Brights is not my color pallette of choice and Gable Green is probably my least favorite green to use of all the SU! colors. But, our Challenge Mom knows what she is doing to get us to "create outside the box". She had us use Gable Green, Tempting Turquoise and Pink (our choice) with a neutral. So here it is in all it's BRIGHT glory!
I was really having a time with my stampin' mojo until I spied a gift bag left over from my birthday last month. I thought "Hmmm, that beautiful orange could become Tempting Turquoise and I think I can find some fun flowers to play with. Let me try Stitched Exotics." I will say that I was tempted to reach for the retired Big Blossom from last year's SAB, but I wanted to try this with something current. Pick-A-Petal would have worked too.
Anyway, I used Versamark and stamped my images on Whisper White cardstock, then embossed with Clear EP. (Next time I will use Glossy White, but I digress) Then I used long post it notes to mask off the top and bottom of the embossed panel and brayered the center with Tempting Turquoise ink. Moving the masks to cover the center, I then brayered with Pink Passion.
The flower centers are accented with Dazzling Diamonds Glitter adhered with the 2 Way Glue Pen. I stamped some extra flowers with Gable Green ink on Whisper White cardstock and cut them out. The large flower has one of those FABULOUS Pink Rhinestone brads in the center (That's the best part of the card if you ask me!) The flowers were mounted on dimensionals and adhered.
The words were stamped with "Way to" from the Just B stamp set and letters from Short Order Alphabet. I used Gable Green for my card base and rounded all the corners for a final touch.
Leave me a comment and tell me what you think - it's not in my comfort zone, but it's good to stretch ourselves once in awhile!
Happy Friday everyone!

Be sure to check out all the other talented artists by clicking on the Bloggers Challenge icon in my sidebar!
Thursday, June 12, 2008
GASP! It's not Stampin' Up!


Well, the second card isn't Stampin' Up! But the first one is!
The other night after I finished Emma's teacher's gift, we both sat down to make her Thank You cards.
Before I became a Stampin' Up! demonstrator, I purchased a lot of stamps from other companies (in addition to my 300+ stamp sets from SU!) and this little girl stamp was one of them. It's an image from Hero Arts called "Just Emma". Now, you KNOW I had to buy it! Ya gotta love a stamp that is named after your beautiful daughter! :)
Anyway, I always let my Emma do her thing with stamping and she chose this image and designed the card herself. I love the thought bubble idea. The greeting she used was from Smarty Pants out of the current Idea Book and Catalog. She used Pink Passion (her favorite) for the card base and stamped the images onto Whisper White. She colored her namesake with Close to Cocoa, Lovely Lilac and Tempting Turquoise markers. She was especially proud of the designer tennies! What do you think? Will her teacher love it?
The other card is again from my leftover stamp camp supplies stash. I used Groovy Guava for the card base and stamped one of the medium flowers from Fabulous Flowers on the River Rock layer in River Rock ink. The Ruby Red cardstock strip is stamped with one of the small flowers from Fabulous Flowers in Ruby Red ink and layered with Groovy Guava Double Stitched ribbon. I stamped 3 more Ruby Red flowers onto Very Vanilla cardstock and cut them out, leaving two of them joined together. I added Copper Brads (retired) to the flower centers to finish them.
They are mounted with dimensionals onto a piece of Very Vanilla that I stamped in collage fashion with Cameo Coral, Groovy Guava and Ruby Red with flowers from that same stamp set. That is then layered onto some textured Groovy Guava cardstock and mounted to the card front. The greeting is from Much Appreciated and is stamped in Ruby Red ink. I did add some pierced corners to the River Rock layer with my Mat Pack and Piercing tool from the Crafter's Tool Kit.
Have a fun evening everyone! If you haven't registered for Stamp Camp this month, you need to do so, my classes are filling up!
Wednesday, June 11, 2008
Apples for the Teacher!


It's that time of year again - yessiree Bob - the end of school! I don't know who's happier about it, Emma or me! LOL! I am looking forward to being able to sleep in a bit longer and spend some quality time with Emma, not just talks in the car while we are driving from home to skating and back again all week long.
Actually, I think the teachers are just as happy about summer as anyone else - I bow down to them, I could not do what they do and I am just glad they are called to do it! If you know any teachers, take a minute to say Thanks - I'm sure they'll appreciate that you said so!
This little box and card set was inspired by a post I saw on another stampers blog - Kelly Lunceford. She is very creative and doesn't know me from Adam, but I loved this idea so I'm sharing it with you. Here is the link to her original post so you can get the measurements: http://flutterbyatomicbutterfly.blogspot.com/2008/06/quick-3-by-3-box-tutorial.html
For my project, I used the Apple stamp from Tart and Tangy (current MINI catalog) and went into my secret stash of retired papers and inks. The box itself and the card bases are created with Cranberry Crisp cardstock and covered with the Olive Stripe paper from the Holiday Thyme Designer Series paper. I also used Buckaroo Blue, True Thyme, Old Olive and Very Vanilla Cardstock for my punch layers. The ribbon is the Cranberry Crisp Stitched ribbon from 2 Christmases ago. (You know, it pays to stock up - you never know when you might need THAT color!)
Anyway, I cut my designer paper for the box sides and top 1/8" smaller than the actual measurement of the actual box section. So if the top was 3" square, then I cut my paper at 2 7/8" square. KWIM? I used Sticky Strip to hold the sides together and I also used Sticky Strip to adhere the paper to the box since she will be opening and closing it.
The note cards are 3" square when folded and the envelopes are the Mini Square envelopes from this current catalog.
It was actually a very EASY project to complete and only took me about 2 hours total including the cutting time. The box holds 12 note cards and 13 mini envelopes.
Just a note: I can't stress strongly enough about being sure you own the refills for your ink pads. The colors I used for this project are from the 1st set of In Colors and I hadn't used any of them since last August when I scrapbooked with them. My Cranberry Crisp ink pad needed to be reinked when I opened it and if I hadn't thought ahead and purchased the refills, I would be out of luck. When you are placing your orders for June, be sure to add In Color refills now, they will sell out quickly next month when the Retiring Accesories list is published!
Hope you like this project - have a happy Wednesday!
Tuesday, June 10, 2008
Just B for Babies!

I just love holding newborn babies, they smell so good and feel so soft and warm. I am always happy to hand them back to Mom though - my baby days are 10 years behind me! LOL!
We do often need ideas for Baby cards, though and this card and envelope combo is one that I created several months ago for a Featured Artist segment on my upline's website.
It was pretty simple construction, utilizing the 1 1/4" square punch for the patchwork pieces. I attached them first to a piece of Very Vanilla cardstock and then trimmed the edges down a bit to make them even. That 'quilted' piece was then attached to the folded Very Vanilla card base.
The buttons are from the Soft Subtles assortment and are attached with a Mini Glue dot. The Key Tag punch created the greeting plate and the ribbon used is the Creamy Caramel gingham. All the edges are sponged with Creamy Caramel ink to give it an antiqued effect.
The paper I chose is from the Prints Pack which is a level one hostess gift in this catalog - and it's going bye-bye soon! All the Hostess stamp sets and accessories retire with every catalog.
You know the Retiring Stamp Set List comes out THIS Sunday, June 15th! The stamp set I used is here called Just B and it was new to this catalog! I stamped the large 'B' image in Bashful Blue to match the paper and trimmed it out with my Paper Snips. It's mounted on dimensionals for height.
One of the things that Stampin' Up! promised us is that ANY stamp set that was NEW to this current catalog will not be retired for at least a year - so that means we have at least until February of 2009 to get this versatile set.
Enjoy the card today stampers - scroll down a few posts to view the winner of my Stamp Camp card leftovers giveaway!
Saturday, June 7, 2008
Color Combo Conundrum
 Never in a million years would I have put Cameo Coral, Blush Blossom, Night of Navy and River Rock together on a card. BUT, never say never, because here it is!
In keeping with my "using up my scraps instead of putting them away" organizational plan, I used pieces of a card that we did at stamp camp a few months ago. The Cameo Coral color comes from the Ginger Blossom Designer Series paper which is acutally the REVERSE side of what we used at camp that month. The other side has River Rock polka dots on it, I think.
Anyway, I used stamps from Embrace Life to create the background on the Very Vanilla piece and to mimic the flower in the patterned paper for the focal image. Stamped in Basic Black and Markered in for color (I'm not a great watercolorer...) I sponged all the layers with River Rock ink and added the three Vintage Brads. I lined them up to perfection by using the Paper Piercer and Punch Mat from the Crafter's Tool Kit. Works like a charm!
The greeting is stamped with Birthday Wishes from the Circle of Friendship stamp set (which is part of the eScape Bundle sale this month!) layered and mounted with dimensionals for height.
Oh, yes, the card base is made with the River Rock TEXTURED cardstock - which if I haven't told SU! loudly enough yet - I LOVE! The texture adds so much dimension and yet is easy to stamp on. So, so cool.
Have a great weekend everyone! See you on Monday!
Friday, June 6, 2008
Blogger's Challenge - Week 50 - Black and White
 If you remember from reading my Blogger's Challenge LAST week - I went thru the whole week thinking it was Black and White week. This card idea has been bouncing around in my head so long that when I finally completed it on Wednesday afternoon, my brain breathed a sign of relief!
Black and white can be quite intimidating to work with, I even told my friend Lissa on Tuesday that I was just "itching" to put some color on this card. BUT - the challenge was for Black and White, period.
Actually, I am delighted with the final result here. Once I stamped the Floral Background stamp in Whisper White Craft ink and embossed it in Winter White embossing powder, I knew it needed the "Fabulous" statement from Fabulous Flowers to show it off properly. The embossing really picks up the light in real life - no need for glitter this time! Yes, that's really me saying that!
The hat pin embellishment that I built from the Pretties Kit just 'felt' right and this particular background has so much going on that I wanted to keep the extras to a minimum. I simply used a small clear rhinestone brad from the Pretties Kit next to the greeting and decorated the corners with the Ticket Punch. A little Whisper White Taffeta ribbon combined with some Basic Black Narrow Grosgrain was all it needed.
Personally, I think this would make a great Graduation card for the special lady graduate in your life or a perfect Congratulations or Encouragement card.
You know, we don't have to be rich, thin or famous to be "Fabulous". Look around you, I'll bet you have a LOT of fabulousness in your life - enjoy it!
In the meantime, be sure to check out all the other great projects from the Blogger's Challenge participants. Click on the logo in my sidebar to find their blogs.
Happy Friday everyone!
Thursday, June 5, 2008
Stamp Camp Leftovers and Card Giveaway!

Hey there! It's Tuesday morning and it's time to announce the winner of this card! Remember, if you left a comment before last evening at 8 pm, your name would go in a drawing to win! My dh has picked a name out of a hat and the WINNER is........... Stacy Stec!
Congratulations Stacy! I'll be delivering the card to you in person! (Since you live just around the corner! LOL!)
Be sure to watch for more contests like this - you could win next time!
No, I'm not talking about FOOD, silly - leftover supplies! Whenever my camps are over for the month, I try and make time to use up the leftover cut supplies on cards for MY card box - which, I confess, sometimes runs bare.
If you were here last week, you will recognize the stamped focal image as the one I used to demonstrate 2-step Stampin' with the Wild Rose stamp set. You guys were sweet and didn't use it for your own card (heehee) so I got to create something new with it. (Did you know that Stampin' Up! created the use of 2 Step Stampin'?)
This card was so simple to make (well, cuz the stamping was already done, but I digress...) I simply took Chocolate Chip cardstock and folded it in half for my base. Then I adhered a cut piece of the Groovy Guava Designer Series Paper (*see note at bottom of this post) to the front.
The ribbon is the Chocolate Chip Satin from the Theatre Ribbon Originals - I just tied it around the front of the card and knotted it on the right side. The stamped roses are layered onto Wild Wasabi cardstock and all are sponged with Chocolate Chip ink.
Using both the Large and Small Oval Punches (love me some punches!) I created the greeting with the Short and Sweet stamp set. The rose layer is popped up on dimensionals, as are the greeting ovals.
Do you like it? Leave me a comment before Monday evening, June 9th at 8 pm est. and tell me what you like about this card. I will draw a random name from the comments submitted and send you the card!
*Just a note about Groovy Guava, Wild Wasabi and the other 4 In-Colors for 2007-08: Remember, that these wonderful colors are ONLY around until the END of this current Idea Book and Catalog. Sometime towards the END OF JULY, SU! will release the list of RETIRING ACCESSORIES AND COLOR PRODUCTS. Based on last year's experience with the In-Colors, those items with the In-Colors in them will probably be the first to disappear from the list. The Retiring Accessories list is 1st come, 1st served and DOES SELL OUT - unlike the stamp set list. If you are loving these colors, please make sure you have sufficient supplies ie.cardstock, ink pads, ink refills and Designer Series Paper BEFORE the list is released in July. That is the only way I can guarantee that you will get the products you need.
Remember, too that ANY orders of $50 or more in June qualify for my Hawaii 5-0 product drawing at the end of the month!
Happy Thursday everyone!
Wednesday, June 4, 2008
June Class Schedule! Read and RSVP!
 Hey, do you like this card? I do - but we are NOT doing it at Card Camp this month! But why, you ask? Well, because we did it at camp LAST month! See what you missed?
Sorry, I just had to do it! We always have such a great time at stamp camp - I hate for anyone to miss out! So take a look at my June dates and times and RSVP right now before they fill up. My last two camps were at capacity so don't wait!
Just Cards Saturday, June 21st 10 am
Just Cards Tuesday, June 24th 7 pm
Going, Going, Gone Retiring Stamps Card Party Saturday, June 28th 10 am
All camps $15 inclusive, $5 deposit with RSVP. 12 participants per class only.
e-mail stampwithrobin@yahoo.com to hold your spot
Now, if you really like this card and want to own one, I am repeating this at my Hostesses Workshops this month. All you have to do is Book and hold a June show to get your hands on one of these babies! Plus a whole lot of other Great, FREE Stampin' Up! supplies of your choice! I love to give things away - so contact me today to find a date on my calendar. Did you know that you can hold your workshop at my Stampin' Studio for FREE? Ask me for details!
By the way, before I forget, this stinkin' cute card was designed by a fellow demonstrator (Kelly Acheson) and it was displayed for all of us on the Bermuda Cruise. I loved her idea so much, I had to share it with you. Thanks Kelly - you rock!
Tuesday, June 3, 2008
eScape with Stampin' Up! in June!
 eScape with Stampin’ Up!
On June 25, 2008, Stampin’ Up! is taking the day to unplug, unwind and reconnect on a personal level with friends and loved ones through handmade cards.
We invite you to eScape with us throughout the month of June!
Attend one of my Stamp Camps (see my website for dates/times available) or host a workshop of your own!
Take advantage of the 25 percent discount on products in the eScape bundle to help you create that special message from the heart.
eScape Bundle Price - $30 for the complete set! (Retail Value - $40!)
Item Number #113700
Special Bundle Package includes:
Love Notes assortment
Circle of Friendship stamp set
Very Vanilla 5/8" grosgrain ribbon
Rose Red Classic Stampin’ Pad®
To take advantage of one or both of these special offers, contact me today! stampwithrobin@yahoo.com or call 703-365-9197
Monday, June 2, 2008
Wonderful Friends

Oh, yes, I am blessed with some wonderful friends! Two of them, Lissa and Nancy, helped me tremendously last weekend with my parent's 50th wedding anniversary party. So, I made them each a card and slipped in a little gift card treat for them.
I really like how this one turned out. I used Certainly Celery for my card base and sponged all the edges with matching ink. Then I stamped the long stemmed flower from Bloomin' Beautiful out of the Occasions Mini in Celery along the left side.
The Designer paper layer is from Spring Silhouetttes and is also sponged with Celery ink. I used Wide and Narrow Celery Grosgrain ribbon for the band and layered the focal point piece on Blue Bayou cardstock that was distressed with the Distressing tool from the Cutter Kit.
My focal point is the flower arrangement stamp also from Bloomin' Beautiful stamped off once then stamped onto Naturals White cardstock in Celery ink. I overstamped the greeting from Wonderful Favorites in Blue Bayou ink. The pearl accents are from the Pretties Kit and I also distressed the edges and then inked them with Celery ink by dragging the edges across the ink pad. It's popped up on Dimensionals for depth and adhered to the card.
Thanks for stopping by today! Happy Monday!
Emma takes Gold!

I just had to share a personal moment with you today - my daughter skated her final singles competition of the season yesterday and she earned her FIRST Singles GOLD medal ever! After a horrible practice session on Saturday, we weren't sure what would happen yesterday, but according to her coach, she skated her best skate ever (of course, WE thought so!) and earned her spot at the top of the podium!
We are so proud of our super skater and I wanted to tell the world! Thanks for indulging my moment of parental pride!
Sunday, June 1, 2008
Birthday Cards!

Well, it looks like I have a FEW stampers out there who wanted to receive a Stampin' Up! prize!
The first card I chose came from my good friend and hostess Paula! She came to stamp camp last week bearing this beauty. I just love the colors and it's simplicity. She used the "Always" stamp set along with a greeting from a cute retired set that's name escapes me at the moment. What really caught my eye is how she cut the Le Jardin Designer paper so that 'Mon Amie' runs across the bottom panel.
Paula will be receiving a roll of Stampin' Up! Narrow Organdy ribbon in Olive (retired) to use on her next creations. Congratulations and thank you Paula!
Subscribe to:
Posts (Atom)