Pages

Friday, December 27, 2013

Easy Valentines Cards - From Christmas Kits!

So.........

I've been missing in action a bit - but not to worry, things in the studio are slowly getting back to normal. Honestly, it's been a struggle some days to find my creative mojo. I miss my Mom more than I ever thought I would and I've just not been 'feeling' it. Know what I mean?

Anyway, there's nothing like a deadline to get me creating again and since I have my Card Crew Club tomorrow, that's exactly what I did this morning.
Here are the two cards they'll be making: 


I had some leftover kits from Christmas and hated to see them wasted, so I incorporated the Limited Edition Follow My Heart stamp set in with the pre-cut cardstock and accessories in the kits to make some fun cards.
The first card used the Merry Little Christmas Simply Created Card Kit. I added a piece of Real Red cardstock and trimmed down the designer pieces to layer them. A little Big Shot action with the heart folder from the Adorning Accents pack and a piece of Coastal Cabana Ruffled Ribbon gave me just what I was looking for here.
Cute, huh?


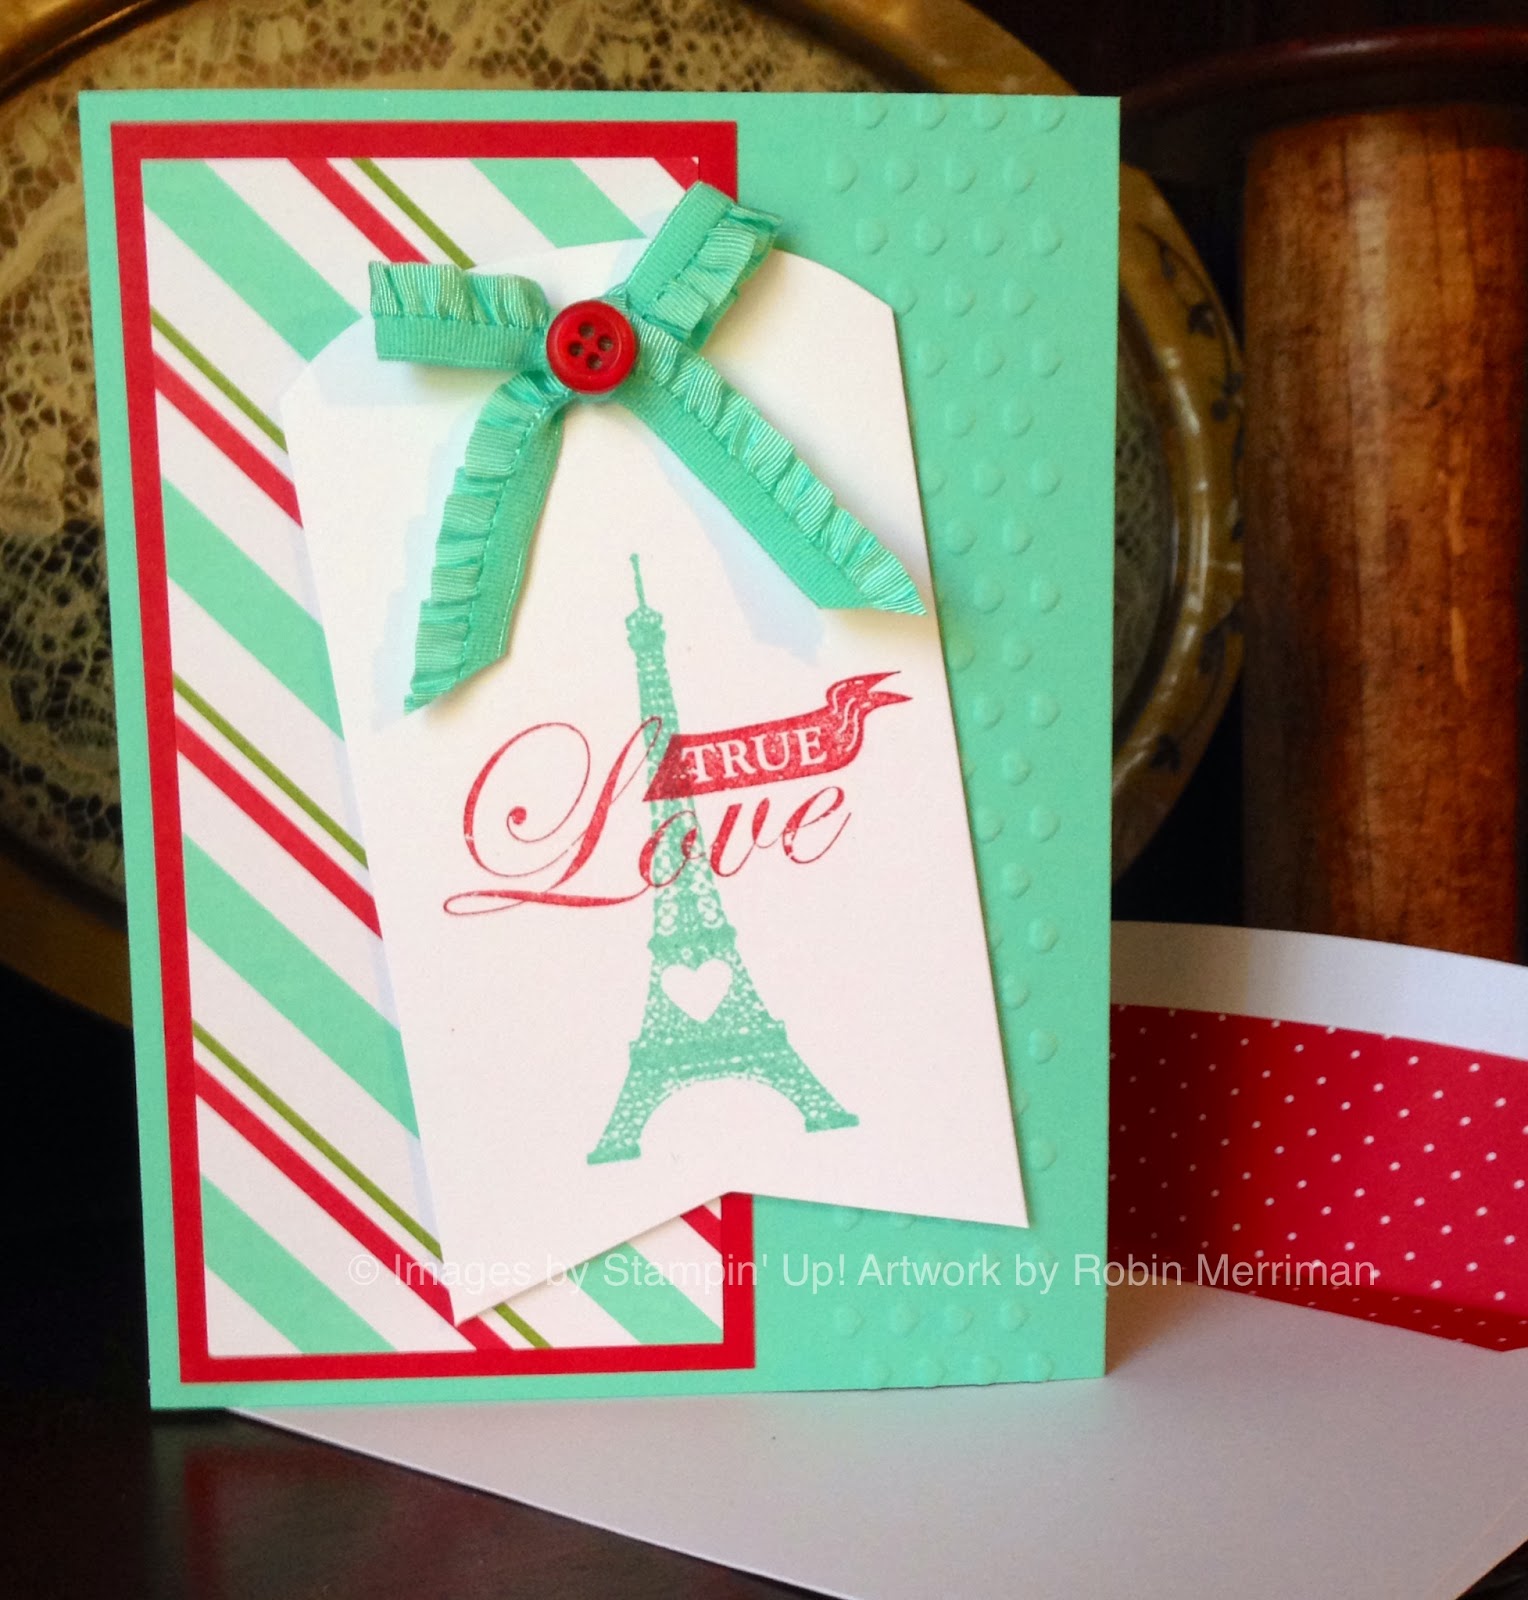
I love the eiffel tower image in this stamp set and wanted something a bit more vintage, but still with a modern feel to incorporate the kit elements.
This kit was the Goodie Gear Simply Created Kit in Real Red.
I added the Postcard background stamp and some hearts from Hearts A-Flutter. There are a couple of framelits sets used - Hearts and Hearts-a-Flutter.
Just a simple collage effect with the cut out elements on a folded Whisper White card base. Nothing too fancy and you can move them around to your hearts content for a different look each time.

So, there you go, don't let your Christmas Kits go to waste, or better yet, grab some from my Online Store before they are gone. Apparently, they are good for more than just Christmas!

Robin's Online Stampin' Store

Happy Stampin'!
~~Robin

Sunday, December 15, 2013

25th Anniversary Blog Tour - December - Best of Snow

Hello stampers!
Welcome to my blog for the last RemARKable Blog Tour of 2013.
I've enjoyed participating in these fun tours and I hope you've enjoyed my projects!

Once again, you've come from the very talented Anne Matasci's blog - Maui Stamper. Since Anne lives in Hawaii, I am really anxious to see just what she came up with for this month's stamp set - Best of Snow.
Not much snow in Hawaii....but knowing Anne, she had some gorgeous art for you.

Here are my two creations:


The first card is the simple, but striking chalkboard effect. This would make a great Christmas card - if' you're still working on those - but I'm needing Thank You's right now, so that's what I did.
It's a Naturals White card base with Basic Black cardstock. The image was heat embossed with Whisper White Craft Ink and White Embossing Powder.
I then rubbed my Embossing Buddy over the surface of the cardstock to give it the chalkboard effect.

The greeting is from the Yippee - Skippee stamp set, stamped in Black Staz-On on Naturals White. I used the Decorative Label Punch for it and layered two Cherry Cobbler punches behind it to create a mat. It's mounted on a snowflake cut out with my Big Shot and the Festive Flurries Framelits ( say THAT three times, fast!) using Silver Glimmer Paper.
All of that is mounted over a strip of the Cherry Cobbler Ribbon and easy-peasy, you're done!

Here's the next card:


This cute hedgehog and his lovely, but chilly girlfriend just screamed Valentine's to me! So, I stamped them in Black Staz-On and colored them in with Stampin' Write Markers. It's Naturals Ivory cardstock mounted on Cherry Cobbler, which is the same color combo for the card itself. I added Crumb Cake for a card base and jazzed it up with a strip of Season of Style Washi Tape inside.

The Red Glimmer Heart was cut out with the heart shape from the Thinlits Circle Card Die Set. I added a strip of Burlap Ribbon over the Naturals White cardstock that I embossed with the Polka Dot embossing folder.
This card made my my daughter smile and that made me do the happy dance!

I'm so glad you stopped by today to take a peek at my cards - I'll be back to regular blogging in January after the Christmas holiday.

For now, be sure to click the tour graphic below to go to our next blog - AbsoluteKreations with Andi Potler. I know she has some awesome art for you!

Happy Sunday and Merry Christmas!
~~Robin


Sunday, December 8, 2013

December Stamp of the Month Blog Tour


Thanks to fellow RemARKable teammate Tamra Davis for getting my post up and running last night at midnight while we were traveling back from Michigan. I'm so grateful for my stampin' sisters!

Anyway, I'm sure you've seen some fantastic projects from the other bloggers on this tour, here are my two projects using one of my favorite stamp sets - Spread the Joy.

Here is my first card:

I used one of the Note Cards with Envelopes as my card base for this simple, masculine note card. The background was stamped with the Dictionary Background stamp in Soft Suede ink. I added a strip of Crumb Cake cardstock sponged with Soft Suede ink and layered it with a smaller strip of Soho Subway Designer Series Paper, also sponged. 

The greeting is stamped on a piece of Smoky Slate cardstock. I colored the stamp with Soft Suede and Midnight Muse Markers before stamping to give it the multi-color look. This would make a great encouragement card for someone who needs a little lift. 
We'll be making this card at stamp camps this month! 

Here is my second project: 


I was wanting to do the chalkboard technique, but when I chose my background paper from the Soho Subway suite again, I decided to emboss the main image with Pool Party on Basic Black. The photo doesn't show the blue tint very well, but it's pretty cool in real life. You just have to trust me on this one! 

I dry embossed the Basic Black accent strip with the Alphabet Embossing Folder and added two Naturals Buttons tied with pieces of the Burlap Ribbon that had been pulled apart. A strip of Twill Ribbon adds a finishing touch. The cardstock layers for the card are Soft Sky and Island Indigo, coordinating with the Designer Paper. 

Hope you like the masculine turn I took with this stamp set - it's so versatile, you can do almost any style with it! 

Now on to the blog of Andi Potler at  http://www.absolutekreations.com or you can just click on the picture below.