Pages

Sunday, January 5, 2014

A New Creative Space

I used to walk in my front door and see my "library". Which was a fancy way of saying a room we never used. Before that, it used to be the "living room", but we never used that either - all of our living is done in the family room or the kitchen or the rec room.

So, what to do with the space?

One of the things I love about my studio space and classroom in our basement is the fact that my hubby built it for me. It's a wonderful space full of built in storage and wall space for displaying artwork - and the stamping friends who grace that space make it a warm and friendly place to be.
But....
It's in the basement.
There's one basement window letting in light and when I am working on projects by myself, it isolates me from my family all tucked back in my corner.

Which is why the unused, unloved "library" space was the perfect place for my new personal studio space. I have the best of everything - a space to call my own for creating, blogging, writing - whatever creative thing sparks my interest on any given day AND I get to be with my family since I'm back in the middle of 'life' in my home.

So back in March, we began the process of personalizing the space. I finally have most of everything where I want it - even though I'm pretty sure things will get moved around as I change my mind. :)

Last week, I took a few photos so I could give you a little tour of my space.
I'll start with the chalkboard sign that Emma wrote a message on for me -


The chalkboard is a frame I found on clearance at a discount store and painted the glass with chalkboard paint.
It's sitting on a vintage 7-up wooden crate that I found at the Antiques Festival in Lucketts this past spring. My hubby added d-ring hangers to the back and hung it to hold my punches. Some of them - I have way too many to fit in here. LOL!
The two containers on the cabinet underneath are also vintage finds. The clear bread box is from a trip to Maine two summers ago and the metal bread box is from Lake Placid, NY last February.


The cabinet they are sitting on holds specialty paper, 12 x 12 paper, grid paper and cardstock scraps. I found it at Hobby Lobby.


The small glass front cabinet holds most of my ink pads and some refills, two of the color families are in vintage sewing machine drawers sitting on top that I found at a local auction.

Sitting to the right of the cabinet is an old half-hoosier with an enamel top that I also found at the Lucketts Store. We painted it and added chalkboard paint to the door fronts.  It's perfect for my embossing station, cutting station and Big Shot station.
The ribbon rack is a reproduction French Bottle drying rack that I purchased at Lucketts. The embossing powder rack is a K-cup lazy susan. There is a wide mouth glass jar that holds ribbon scraps and a wrought iron stand for my embossing gun. The lamp is sitting on a vintage wooden spool that still has the original wrapped copper wire on it. I found it in my parents garage this summer along with the orange metal counter bell that sits behind it. The bell sat on the counter at my parents picture frame shop for as long as I can remember. Makes me feel like a part of their history is there with me.


The wood shutters on the wall above the cabinet came from a salvage yard in Maine and I found that awesome canvas at Kohls - yes, really!
The cabinet drawers and doors hold punches, Big Shot Dies, paper cutters, adhesives, envelopes - lots of supplies in different storage containers. 


The photo above is looking into my space from the open hallway. You can see the library shelves that hold my stamps and other supplies along with a few other vintage pieces and memories.

The next photo is of the amazing work table that Mark built for me from an antique door. He built the base from scratch and mounted the door to it and we topped it with a piece of tempered glass after it was painted. It's one of the most treasured pieces of furniture in my home now and I made Emma promise me that she will never get rid of it! LOL!

The rolling iron garden cart was a find at Home Goods and sits under the left end of the table holding my markers, blocks and other supplies. The wire basket rack between the windows holds all my 8 1/2" x 11" cardstock and is also from Home Goods. We found the hanging lamp at Habitat for Humanity Re-store and Mark re-wired and hung it over my work table. 


There are a few treasures on my work table too.
A vintage kitchen caddy with metal topped jars that I found in Maine and a vintage rubber stamp holder from Lucketts. An antique sugar shaker holds my glitter and a vintage jelly glass holds pens, bone folders, etc.
The two Heisey glass goblets belonged to Mark's Granny and they hold my Antique buttons and Brads. 


The way I have my bookshelves organized with open wire baskets allows me to easily see inside. I'd started out with canvas bins but they didn't really fit the look I wanted and I couldn't see in them either. 
The top shelf of both bookcases holds photos and memories along with a few vintage finds. The bottom shelves still have books on them as well as a few more special photos. 
The wire basket on the floor holds my Designer Paper separated by cardboard dividers.


Here's a closer look at the right side bookshelf.
The two wire baskets on the upper shelf hold products from the new Occasions/Spring catalog and from the upcoming Sale-A-Bration Brochure.


The left side shelf is mostly memories and family photos along with some of my artwork on display.


I love being in this space, surrounded by photos and memories of people I love and places I've experienced. They inspire my art and creations every day and it brings me joy to know they are part of  my creative process.

I hope you've enjoyed the tour, thanks for stopping by to take a peek into my world today.


Happy Stamping!
~~Robin

Thursday, January 2, 2014

Spring Sneak Peek - Hardwood and Floral

Tomorrow is a big day -
The New Occasions Catalog begins!

I've had a little time to play with some of the trendy new products you'll find there and here's a sneak peek for you -


I created this card for a card swap I'm in and I was looking for something fresh and fun.
This card was the result - and I really love how it came out.

It uses a TON of new products on it - all will be available tomorrow!! Do you have your catalog yet?
Let me know if you need one - unless you are an SU! demo or already have one, ok?

Here's a short list of stuff I used on this card:
Colors: Island Indigo, Smoky Slate, Naturals White, Watercolor Wonder Designer Paper (Gumball Green is the green in this piece) and Silver
Hardwood Background stamp
Simply Celebrate stamp set
Silver Baker's Twine
Silver Foil Paper
Starburst Framelits Dies
Alphabet Embossing Folder
Island Indigo Baker's Twine
Banners Framelits Dies

Ok, that's a long list, but there you go. :)
What do you think, like it?

Happy stampin'!
~~Robin

Shop 24/7 in my Online Store at this link:
Robin's Online Stampin' Up! Store

Visit my Facebook page at this link:
Trinity Design Studios - Paper Crafting and Fun

Follow me on Twitter:
@robinstampssu

Follow me on Pinterest:
stampwithrobin

Friday, December 27, 2013

Easy Valentines Cards - From Christmas Kits!

So.........

I've been missing in action a bit - but not to worry, things in the studio are slowly getting back to normal. Honestly, it's been a struggle some days to find my creative mojo. I miss my Mom more than I ever thought I would and I've just not been 'feeling' it. Know what I mean?

Anyway, there's nothing like a deadline to get me creating again and since I have my Card Crew Club tomorrow, that's exactly what I did this morning.
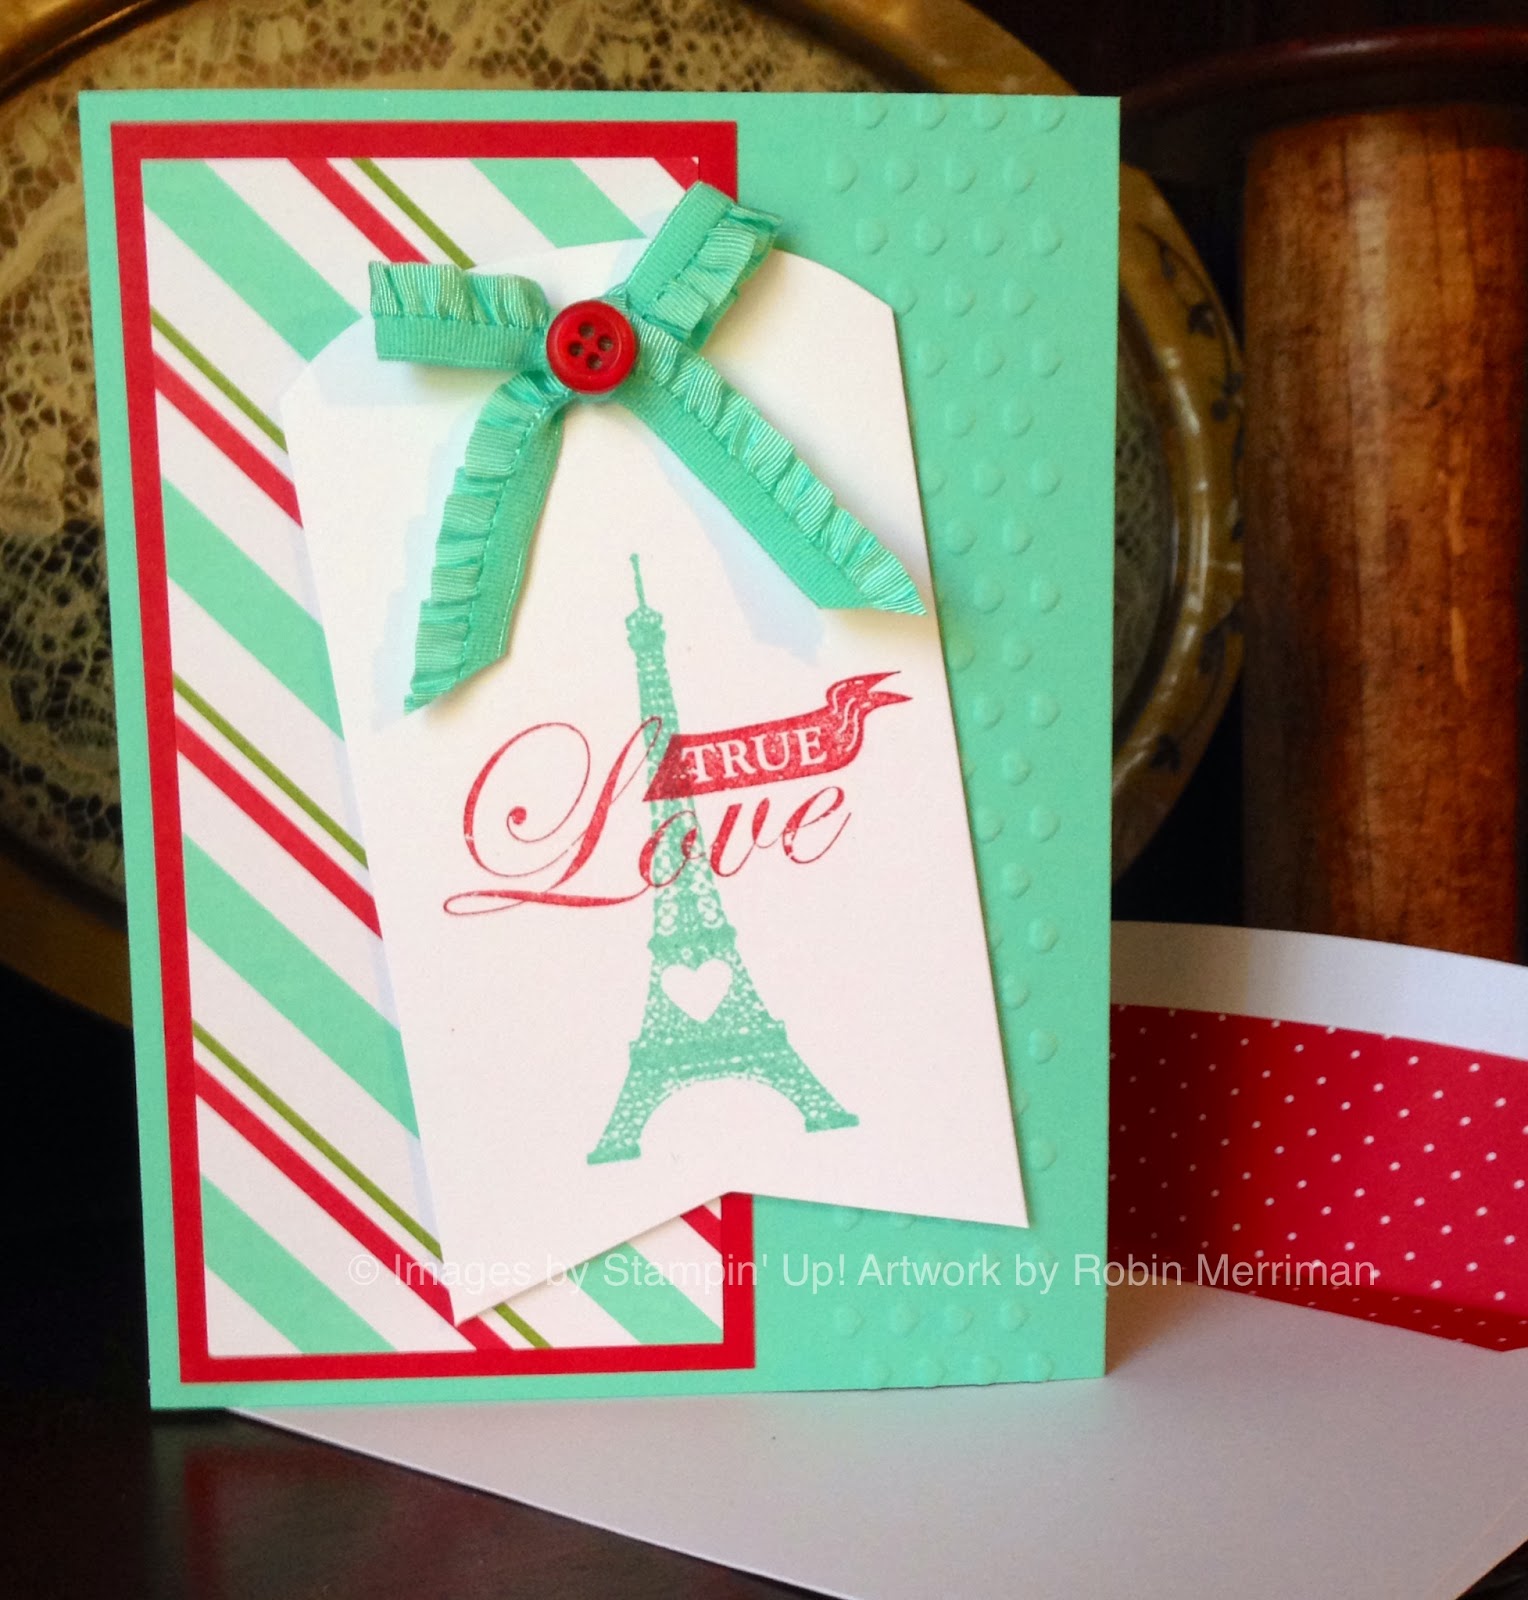
Here are the two cards they'll be making: 


I had some leftover kits from Christmas and hated to see them wasted, so I incorporated the Limited Edition Follow My Heart stamp set in with the pre-cut cardstock and accessories in the kits to make some fun cards.
The first card used the Merry Little Christmas Simply Created Card Kit. I added a piece of Real Red cardstock and trimmed down the designer pieces to layer them. A little Big Shot action with the heart folder from the Adorning Accents pack and a piece of Coastal Cabana Ruffled Ribbon gave me just what I was looking for here.
Cute, huh?


I love the eiffel tower image in this stamp set and wanted something a bit more vintage, but still with a modern feel to incorporate the kit elements.
This kit was the Goodie Gear Simply Created Kit in Real Red.
I added the Postcard background stamp and some hearts from Hearts A-Flutter. There are a couple of framelits sets used - Hearts and Hearts-a-Flutter.
Just a simple collage effect with the cut out elements on a folded Whisper White card base. Nothing too fancy and you can move them around to your hearts content for a different look each time.

So, there you go, don't let your Christmas Kits go to waste, or better yet, grab some from my Online Store before they are gone. Apparently, they are good for more than just Christmas!

Robin's Online Stampin' Store

Happy Stampin'!
~~Robin

Sunday, December 15, 2013

25th Anniversary Blog Tour - December - Best of Snow

Hello stampers!
Welcome to my blog for the last RemARKable Blog Tour of 2013.
I've enjoyed participating in these fun tours and I hope you've enjoyed my projects!

Once again, you've come from the very talented Anne Matasci's blog - Maui Stamper. Since Anne lives in Hawaii, I am really anxious to see just what she came up with for this month's stamp set - Best of Snow.
Not much snow in Hawaii....but knowing Anne, she had some gorgeous art for you.

Here are my two creations:


The first card is the simple, but striking chalkboard effect. This would make a great Christmas card - if' you're still working on those - but I'm needing Thank You's right now, so that's what I did.
It's a Naturals White card base with Basic Black cardstock. The image was heat embossed with Whisper White Craft Ink and White Embossing Powder.
I then rubbed my Embossing Buddy over the surface of the cardstock to give it the chalkboard effect.

The greeting is from the Yippee - Skippee stamp set, stamped in Black Staz-On on Naturals White. I used the Decorative Label Punch for it and layered two Cherry Cobbler punches behind it to create a mat. It's mounted on a snowflake cut out with my Big Shot and the Festive Flurries Framelits ( say THAT three times, fast!) using Silver Glimmer Paper.
All of that is mounted over a strip of the Cherry Cobbler Ribbon and easy-peasy, you're done!

Here's the next card:


This cute hedgehog and his lovely, but chilly girlfriend just screamed Valentine's to me! So, I stamped them in Black Staz-On and colored them in with Stampin' Write Markers. It's Naturals Ivory cardstock mounted on Cherry Cobbler, which is the same color combo for the card itself. I added Crumb Cake for a card base and jazzed it up with a strip of Season of Style Washi Tape inside.

The Red Glimmer Heart was cut out with the heart shape from the Thinlits Circle Card Die Set. I added a strip of Burlap Ribbon over the Naturals White cardstock that I embossed with the Polka Dot embossing folder.
This card made my my daughter smile and that made me do the happy dance!

I'm so glad you stopped by today to take a peek at my cards - I'll be back to regular blogging in January after the Christmas holiday.

For now, be sure to click the tour graphic below to go to our next blog - AbsoluteKreations with Andi Potler. I know she has some awesome art for you!

Happy Sunday and Merry Christmas!
~~Robin


Sunday, December 8, 2013

December Stamp of the Month Blog Tour


Thanks to fellow RemARKable teammate Tamra Davis for getting my post up and running last night at midnight while we were traveling back from Michigan. I'm so grateful for my stampin' sisters!

Anyway, I'm sure you've seen some fantastic projects from the other bloggers on this tour, here are my two projects using one of my favorite stamp sets - Spread the Joy.

Here is my first card:

I used one of the Note Cards with Envelopes as my card base for this simple, masculine note card. The background was stamped with the Dictionary Background stamp in Soft Suede ink. I added a strip of Crumb Cake cardstock sponged with Soft Suede ink and layered it with a smaller strip of Soho Subway Designer Series Paper, also sponged. 

The greeting is stamped on a piece of Smoky Slate cardstock. I colored the stamp with Soft Suede and Midnight Muse Markers before stamping to give it the multi-color look. This would make a great encouragement card for someone who needs a little lift. 
We'll be making this card at stamp camps this month! 

Here is my second project: 


I was wanting to do the chalkboard technique, but when I chose my background paper from the Soho Subway suite again, I decided to emboss the main image with Pool Party on Basic Black. The photo doesn't show the blue tint very well, but it's pretty cool in real life. You just have to trust me on this one! 

I dry embossed the Basic Black accent strip with the Alphabet Embossing Folder and added two Naturals Buttons tied with pieces of the Burlap Ribbon that had been pulled apart. A strip of Twill Ribbon adds a finishing touch. The cardstock layers for the card are Soft Sky and Island Indigo, coordinating with the Designer Paper. 

Hope you like the masculine turn I took with this stamp set - it's so versatile, you can do almost any style with it! 

Now on to the blog of Andi Potler at  http://www.absolutekreations.com or you can just click on the picture below.


Sunday, October 13, 2013

RemARKable Stampers Blog Tour - October Stamp of the Month

Hello stampers!

I'm so glad you're taking our RemARKable Blog Tour today - you've just come from Anne Matasci's blog, Maui Stamper. I know she had some great ideas for you!

For this month's Stamp of the Month tour, we had a choice between Christmas Collectibles and Harvest of Thanks. Since I've just begun to pull out my Fall decorations and am feeling the Fall vibe, I went with Harvest of Thanks.
My samples are a decorated Kraft Gift Box and a clean and simple Thank You card. I was able to combine several of our Holiday Mini Catalog products for the designs and it was a wonderfully relaxing 2 hours.
Here, take a look at what I created for you:


This Kraft Gift Box is wrapped around with a piece of the birch bark paper from the Thankful Tablescape Simply Created Kit. The components of that kit are AWESOME, even if you aren't into doing placesettings.

The top has a piece of Cajun Craze cardstock and another piece of the birch bark paper. It's topped with a fall flower made of the Burlap Ribbon, a strip of paper from the Thankful Tablescape kit, Gold Glimmer paper, an Antique Brad and a leaf from the Tablescape kit. 


The "flower" is done with one of the Sticky Rounds which made it easy to form the circular shape.
To give the leaf it's veins, I simply folded it and sponged the fold lines with Crumb Cake ink.

Check out the tag though:


I made it by coloring on the stamp with Stampin' Write Markers then it was cut out with my Big Shot and the Apothecary Accents Framelits. A couple of strands of the burlap from the ribbon "flower" were tied around the tag for an accent, then I added a Naturals Button with another burlap strand to tie it onto the flower.
Really super easy!

Here's my card project:


I used Soft Sky cardstock for my card base and stamped it with the Off the Grid stamp in Crumb Cake ink.
The paper strips are both from the Thankful Tablescape Kit. They are the rolled pieces, simply cut down to size. Another leaf from the kit was veined and crumpled, then added to the card front.


After adding a circle of Gold Glimmer paper, I stamped the Thanks greeting twice. Once in Chocolate Chip, once in Midnight Muse. The Apothecary Accents Framelits were used to cut them both out, then I trimmed out the greeting from the Midnight Muse piece and added it with Stampin' Dimensionals.
I love the color combo of blue, brown and gold - so awesome for Fall!

I hope I've inspired you with some fun Fall projects, I'd love to hear your comments!
Your next stop on the Blog Tour is Audra Monk's blog - The Crafty Yogi.
You can click the link, or the Blog Tour icon below to head over there. I've also included a list of all the tour participants at the bottom of this post so you don't miss any!

Have a wonderful Sunday!
~~Robin


Blog Tour Participants:

Nancy Amato             http://stampinallnight.blogspot.com
Melissa Bolinger        http://www.stampinup.net/blog/2089191
Jackie Bottomley       http://www.jackiebottomley.blogspot.com
Susan Carlson            http://stampinmomoffour.blogspot.com
Tamra Davis              http://www.thecardladies.com
Connie Deibler          http://www.conniestamps.com 
Sherri Eddleblute      http://www.sweetestdesigns.blogspot.com
Crystal Kondo           http://www.card-ed.com
Deb Lehigh               http://thestampinhut.typepad.com
Anne Matasci            http://www.MauiStamper.wordpress.com
Robin Merriman       http://www.trinitydesignstudio.blogspot.com
Audra Monk             http://thecraftyyogi.blogspot.com
Maria Pane                http://www.stampinandscrappinwithriri.blogspot.com
Andi Potler                http://www.absolutekreations.com
Michele Reynolds     http://www.inspirationink.typepad.com
Pam Staples              http://www.sunnygirlscraps.com
Jeri St. John              https://jerrisgemtastics.blogspot.com
Jeannette Swain        http://www.stampsnwhatnot.com
Janet Wakeland         http://www.remarkablycreated.com

Saturday, October 5, 2013

The BEST $25 You'll Ever Spend

What was the last thing you spent $25 on?
Dry Cleaning?
1/2 tank of gas?
McDonald's meal for 4?
Don't you think that your next $25 spent should be on something you LOVE?

Yeah, I thought so.

Here's the deal - between October 7th and October 21st, you have a once in a blue moon chance to try out Stampin' Up!
Just $25 gets you all the benefits and privileges that come with being part of my amazing company. (including a generous discount!)

And the best part - You have until the end of April to enjoy all the insider info and creative ideas that I have access to without any pressure to hold parties or make sales.

Yeah, it's true.
Crazy, right?
Want to know more?

Send me an e-mail at stampwithrobin@yahoo.com OR
Message me on my Facebook page at https://www.facebook.com/TrinityDesignStudio OR
Simply check out the info at this link: http://www.stampinup.net/esuite/home/robinstamps4u/promotions

If you already know you want to try it out then you can click this link to Join on October 7th!
http://www.stampinup.net/esuite/home/robinstamps4u/jointhefun

I can't wait to welcome you to my SU! family!
~~Robin

The Fine Print:
This offer is only good for two weeks, so take advantage of it right away!
  • During this offer, only the special $25 starter kit will be available; the regular $99 starter kit will not be available. 
  • The $25 Starter Kit includes $26.95 worth of Stampin' Up! product of your choice!(it must be more than $25, but not more than $26.95 before tax) 
  • You get Two FREE months of your own Stampin' Up! Website!
  • Business pack which includes:
  1. A box of annual catalogs 
  2. A package of the current seasonal catalog 
  3. Getting Started DVD 
  4. Customer Order Forms 
  5. Customer postcards
First Order Perks: 
  • If you place your first order of at least $150 within 30 days of your start date, you can: choose any stamp set from the 2013-2014 annual catalog (redeemable with your first order in December). 
  •  Receive 30% instant income on your first order and any eligible hostess benefits as well!
You only have until midnight on October 21st to get this deal. Think about all the money you'll save this season with your exclusive discount on the supplies you'll need anyway for the holidays! That alone is reason enough to check it out!