
If you are taking our RemARKable Blog Tour in order, you've just come from Anne Matasci's blog Maui Stamper. I know Anne's style and I'm sure she had some gorgeous artwork for you! I hope you'll continue to be inspired with ideas for the Best of Birthdays stamp set.
I've got three projects for you using this great collection of Stampin' Up! images.
Here's the first one:

I took four of the images and stamped them in four different colors onto Whisper White cardstock - Midnight Muse, Primrose Petals, Baja Breeze and Summer Starfruit. I chose not to overlap them, so my background is more like the currently popular Subway Art than a collage.
This layer was mounted on a folded piece of Primrose Petals cardstock.

Next, I mounted a cut piece of Patio Party Designer Series Paper onto a piece of Midnight Muse cardstock. I wrapped a piece of Summer Starfruit stitched ribbon around the strips and added a bow with Mini Glue Dots. This was mounted to the card front.
The focal point was stamped in Primrose Petals ink then punched out with the Large Oval Punch. I colored in the heart with the matching Stampin' Write Marker and added some Dazzling Diamonds to the icing with my 2 Way Glue Pen. That oval is mounted on to an oval piece of Patio Party Paper that's cut with the Ovals Collection Framelits. They both had more glitter added to the edges before I mounted them with Stampin' Dimensionals onto the card front.

The inside was simply done with just the greeting stamped in Summer Starfruit and the little package in Midnight Muse.
This is a great unisex card and would even be great for a teen! The colors and the images work so very well together.

I enjoyed playing with the Patio Party Designer Series Paper so much that I decided to use it again on something even more fun than a birthday card - Cupcake Picks!
These are so quick and easy to assemble - I chose not to use glitter so we didn't run the risk of getting it on the cupcakes.
Oh yeah, we did eat them after the photo shoot - they were really delicious! Hey, every job has it's perks. :)

I chose two of the images and used the chalkboard technique with them for these picks. Stamping in Versamark and heat embossing with White embossing powder. I punched them out with the 1 3/8" Circle Punch and layered them on a circle I'd punched out of another sheet of the Patio Party Paper with my 1 3/4" Circle Punch.
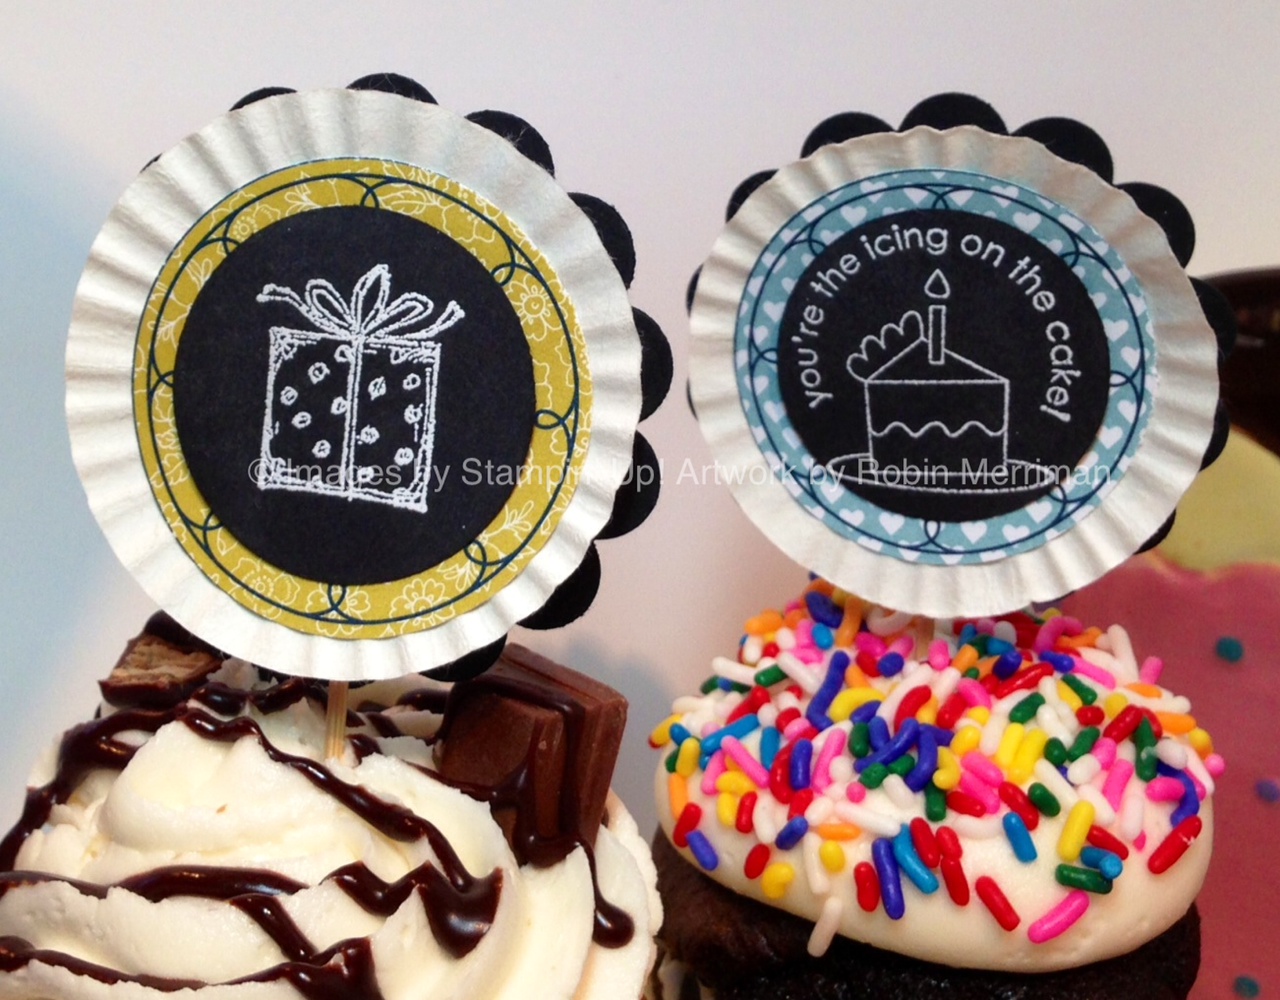
The circles were mounted onto one of the little cupcake lines from the Pop-Up Posies Kit (again, I have yet to use that kit for making the flowers it was intended to make - the pieces are just fantastic on their own!). I used Stampin' Dimensionals to adhere them together and then mounted it all to a Scallop Circle Punched out with my 2 3/8" Scallop Circle Punch. I added an extra-long toothpick before attaching them together.
They are so cute I hate to throw them away after using them in the cupcakes!

So, one last project today - and it's in a completely different direction creatively than my first two. Just showing how versatile this stamp set can be.
One of the images is this brand new one - and it's very swirly and elegant to me.

The card base is Whisper White and the layer is Midnight Muse cardstock. I used the new Swallowtail Background stamp and inked it in Versamark, embossing the image in Silver with a stunning result. I LOVE this!
Before I mounted it to the card base, I spritzed it with some Frost White Shimmer Paint mixed with rubbing alcohol in my Stampin' Spritzer. It added just the right touch to complete the background.

The greeting was stamped twice on Whisper White scrap. Once in Midnight Muse and punched out with the Large Oval Punch. The other was stamped in Versamark and heat embossed in Silver. I used my Paper Snips to trim out the birthday banner from the center, then mounted it with Stampin' Dimensionals to the other one.
This in turn was mounted on a piece of Brushed Silver cardstock cut out with the Ovals Framelits. I added two Basic Rhinestones to the sides of the silver piece then mounted the whole thing with dimensionals to the card front.
Here's a look at the inside:

Very simply done with a greeting from Bring on the Cake and the sweet butterfly image from Bloomin' Marvelous (a Sale-A-Bration stamp set). I did stamp the butterfly in Midnight Muse, but I stamped off once and then twice to get the lighter images.
Here's the entire stamp set, as you can see, I used all but one of the images this time.
 |
| #132929 - Best of Birthdays $14.95 |
I hope you've enjoyed your stop here at my blog on the tour, you've still got lots of great ideas ahead of you so be sure to keep going! Just click on this icon to go to the next blog, you're headed for Andi Potler's blog next.

Have a wonderful Sunday and Happy Stampin'!
~~Robin
So many great ideas, I don't know where to start.
ReplyDeleteLove them all! The butterfly is gorgeous!
ReplyDeleteLove your projects, Robin! The butterfly is truly gorgeous and would make a beautiful anniversary card too - but I love those cupcake toppers.
ReplyDeletePinning the butterfly!
ReplyDelete